In my previous post, I walked through using an SPD 2013 workflow with the Call HTTP Web Service action to create a subsite in SharePoint. In that post, we used Kirk Evans’ sample code, which looks like this:
body: { 'd' :{
     'parameters': {
         '__metadata':  {'type': 'SP.WebInfoCreationInformation' },
         'Url': 'RestSubWeb',
         'Title': 'RestSubWeb',
         'Description': 'rest-created web',
         'Language':1033,
         'WebTemplate':'sts',
         'UseUniquePermissions':false}
     }}
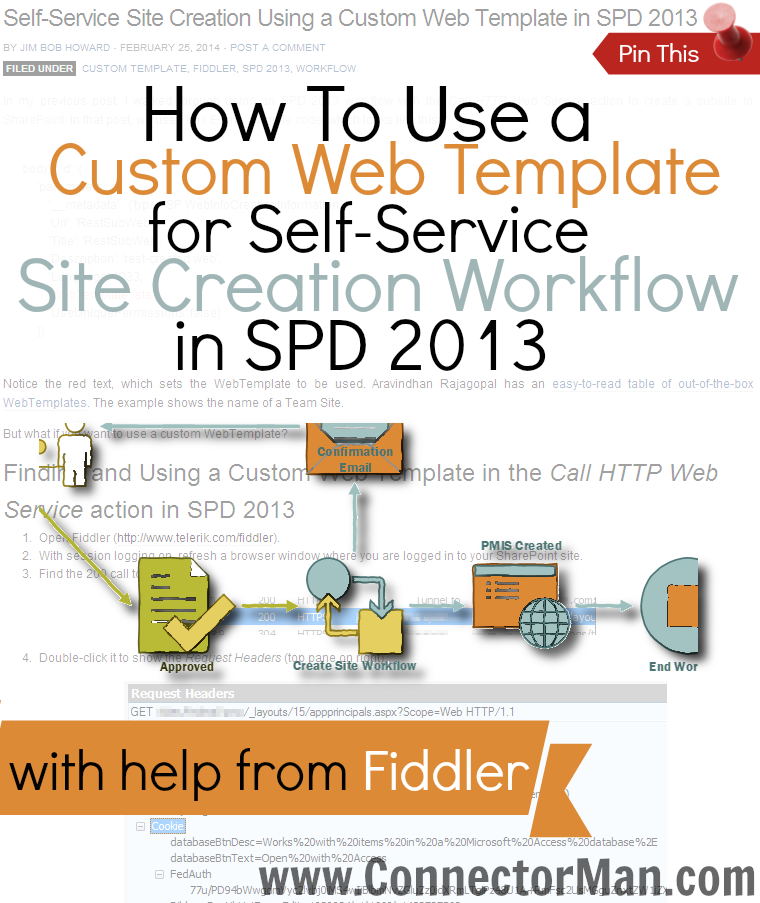
Notice the red text, which sets the WebTemplate to be used. Aravindhan Rajagopal has an easy-to-read table of out-of-the-box WebTemplates. The example shows the name of a Team Site.
But what if you want to use a custom WebTemplate?
Finding and Using a Custom Web Template in the Call HTTP Web Service action in SPD 2013
- Open Fiddler (http://www.telerik.com/fiddler).
- With session logging on, refresh a browser window where you are logged in to your SharePoint site.
- Find the 200 call to your site:

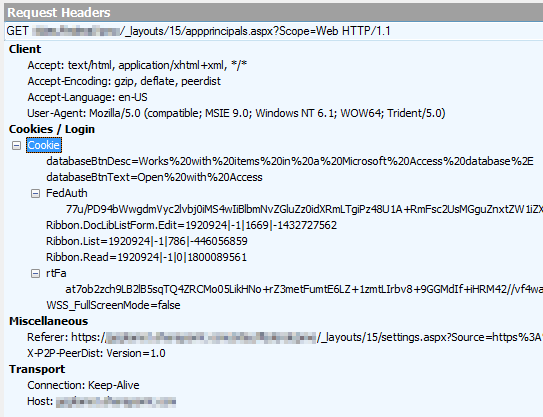
- Double-click it to show the Request Headers (top pane on right)
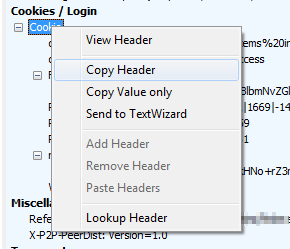
- Right-click Cookie and select Copy Header:
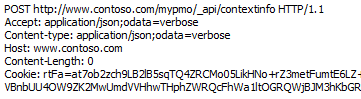
- On the Composer tab, create a payload like this (changing “https://www.contoso.com/mypmo” to your site URL):
POST https://www.contoso.com/mypmo/_api/contextinfo HTTP/1.1
Accept: application/json;odata=verbose
Content-type: application/json;odata=verbose
Host: www.contoso.com
Content-Length: 0
- Paste in the Cookie and delete everything except the FedAuth and rtFa:
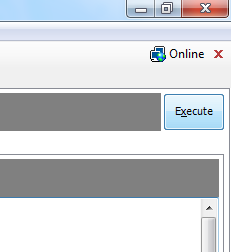
- Highlight all of the above and click Execute on the top right of the screen.
- Find the response from that session in the window on the left.

- Double-click it to see the response (bottom pane on the right). Click the JSON tab (if not already selected):

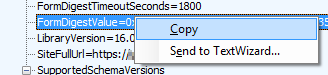
- Find the FormDigestValue in the response object. (Does this look like an SPD 2013 Dictionary to you?)

- Right-click it and select Copy
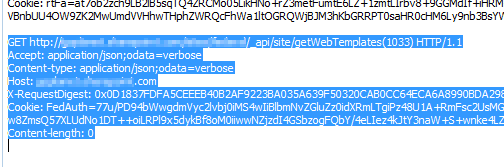
- On the Composer tab, create a payload like this (make sure the GET is pointing to your top-level site collection):
GET http://www.contoso.com/_api/site/getWebTemplates(1033) HTTP/1.1
Accept: application/json;odata=verbose
Content-type: application/json;odata=verbose
Host: www.contoso.com
Content-length: 0
- Copy the Cookie from your previous session and paste it after the Host line
- On the next line, add an X-RequestDigest line and paste the FormDigestValue in it:
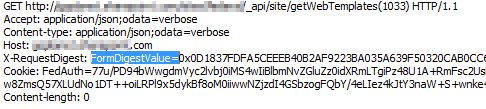
- Remove the FormDigestValue= portion highlighted above.
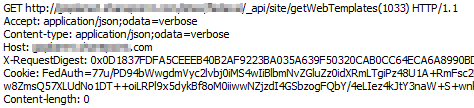
- Highlight the entire GET block and click Execute:
- Find the response in the session pane at left (notice the JSON icon; our Accept setting tells REST to give us the Response as JSON):

- Double-click on it to open the response pane (bottom right):
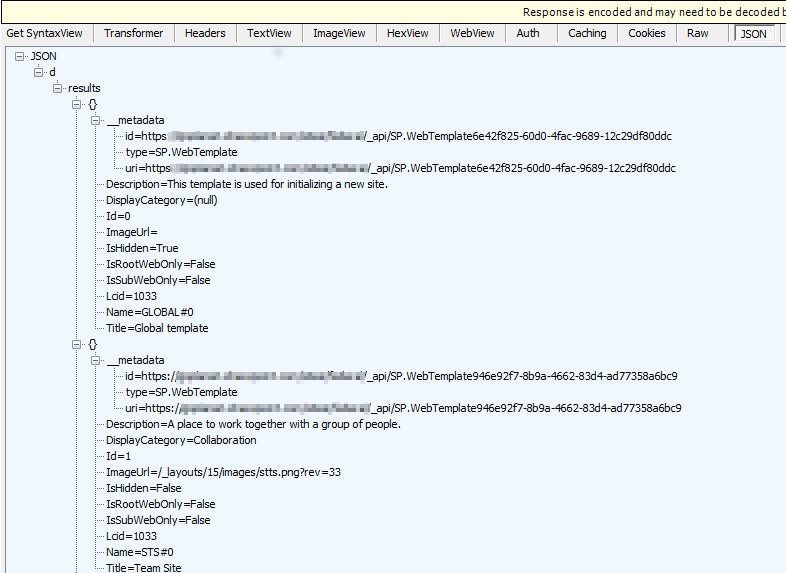
Notice that the second result is the one we used by default: sts, for a Team Site.
- Scroll to the bottom to find custom templates that have been saved for the site collection:
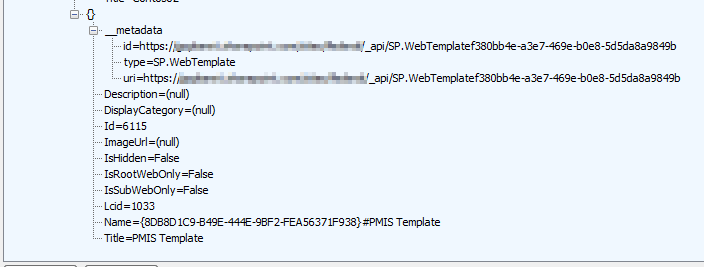
- Find the Name of the template you want to use, and right-click on it to select Copy

- Use this value in your SPD 2013 callParams dictionary for the WebTemplate item, when using the Call HTTP Web Service action to create a site.
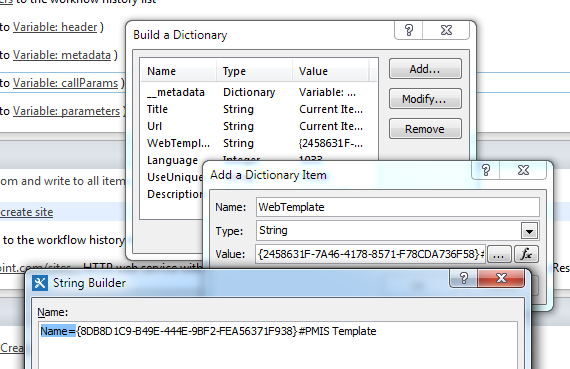
Be sure to remove the Name= portion highlighted in the image.
- Now when your App Step runs, it will use this custom template when creating new sites.
In SharePoint, there is always (or usually) more than one way to do things.
If you’ve read this far and walked through all of the steps, you’ve learned some valuable ways to work with SharePoint and Fiddler, calling REST services and how they’ll work in a workflow.
But next time you want to find the name of a custom web template, there’s a shorter way to get it from the browser.
Alternative Way
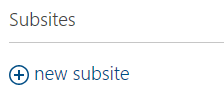
- Go to Site Contents

- Click new subsite:
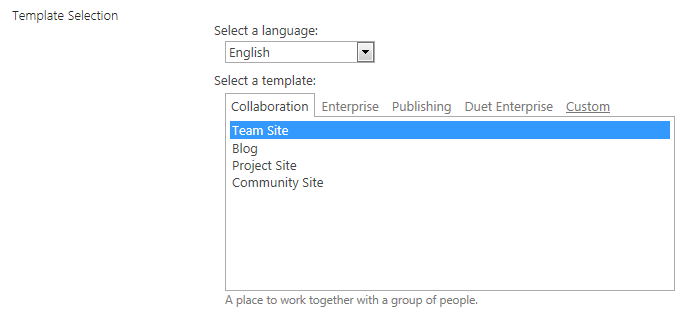
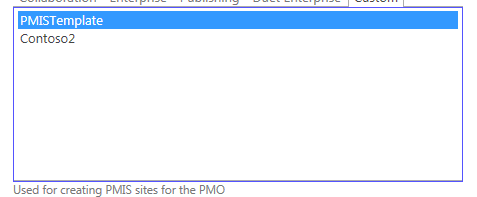
- In the Template Selection area, click the Custom tab:
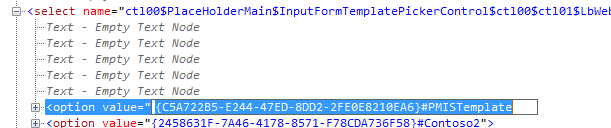
- Press F12 to open Internet Tools (on IE) and click the Select element by click button (or right-click and choose Inspect Element [on Chrome and FireFox], and skip to step 6):

- Click the name of your custom template:
- In the Internet tools pane, expand the highlighted select node:

- Click the option value for your custom template, and copy that into your workflow:
The Alternative Way makes things easy if you want to hardcode the template to be used. But if you ever need to get the information programatically, you can use the REST call to get it, even from a workflow.
Making the Connection
How are YOU using REST end-points in an SPD 2013 workflow? I’d love to share more examples here.


Discussion
No comments yet.